Following the complete exchange
You have chosen a photo book in the printing application. The next step is to choose photos from your photo account. You select Connect photo account.
That button starts several conversations. Your browser visits the photo service, the photo service returns a response to the printer, and the printer asks for the credential it will use at the photo API. Following who sends each message helps explain why OAuth uses more than one endpoint.
Preparing the connection
Before this connection begins, the printer has a client registration with the photo service. That registration includes a client ID and an allowed return address. In our fictional example, they are:
Client ID: photo-printer
Redirect URI: https://printer.example/oauth/callback
The printer also knows the photo service's authorization and token endpoints from trusted configuration. It does not discover where to send credentials by trusting an address supplied in a returning browser request.
When you select Connect, the printer creates a pending transaction associated with your current session. This record holds the details needed to finish this particular attempt, including a value called state and a secret called a PKCE verifier. We will examine the verifier in Proof Key for Code Exchange (PKCE) and state in Correlating requests and responses.
Visiting the photo service
The printer directs your browser to the photo service's authorization endpoint. Its request identifies the printer, asks for permission to read photos, and specifies the registered return address.
The photo service checks the request and establishes which photo account is involved. You might need to sign in, or you might already have a session there. It then decides whether to authorize the requested access. Depending on previous approval and service policy, you may see a consent screen.
When the request succeeds, the photo service sends your browser back to the printer with an authorization code. This is an intermediate credential. The photo API does not accept it as permission to retrieve photos.
Finishing the exchange
The printer checks that the response belongs to the pending connection attempt. Its backend then sends the code to the token endpoint, together with its PKCE verifier and the client authentication required by its registration.
If those checks succeed, the token endpoint returns an access token to the backend. The backend uses that token when requesting photos from the API. The API still decides whether the requested operation is permitted.
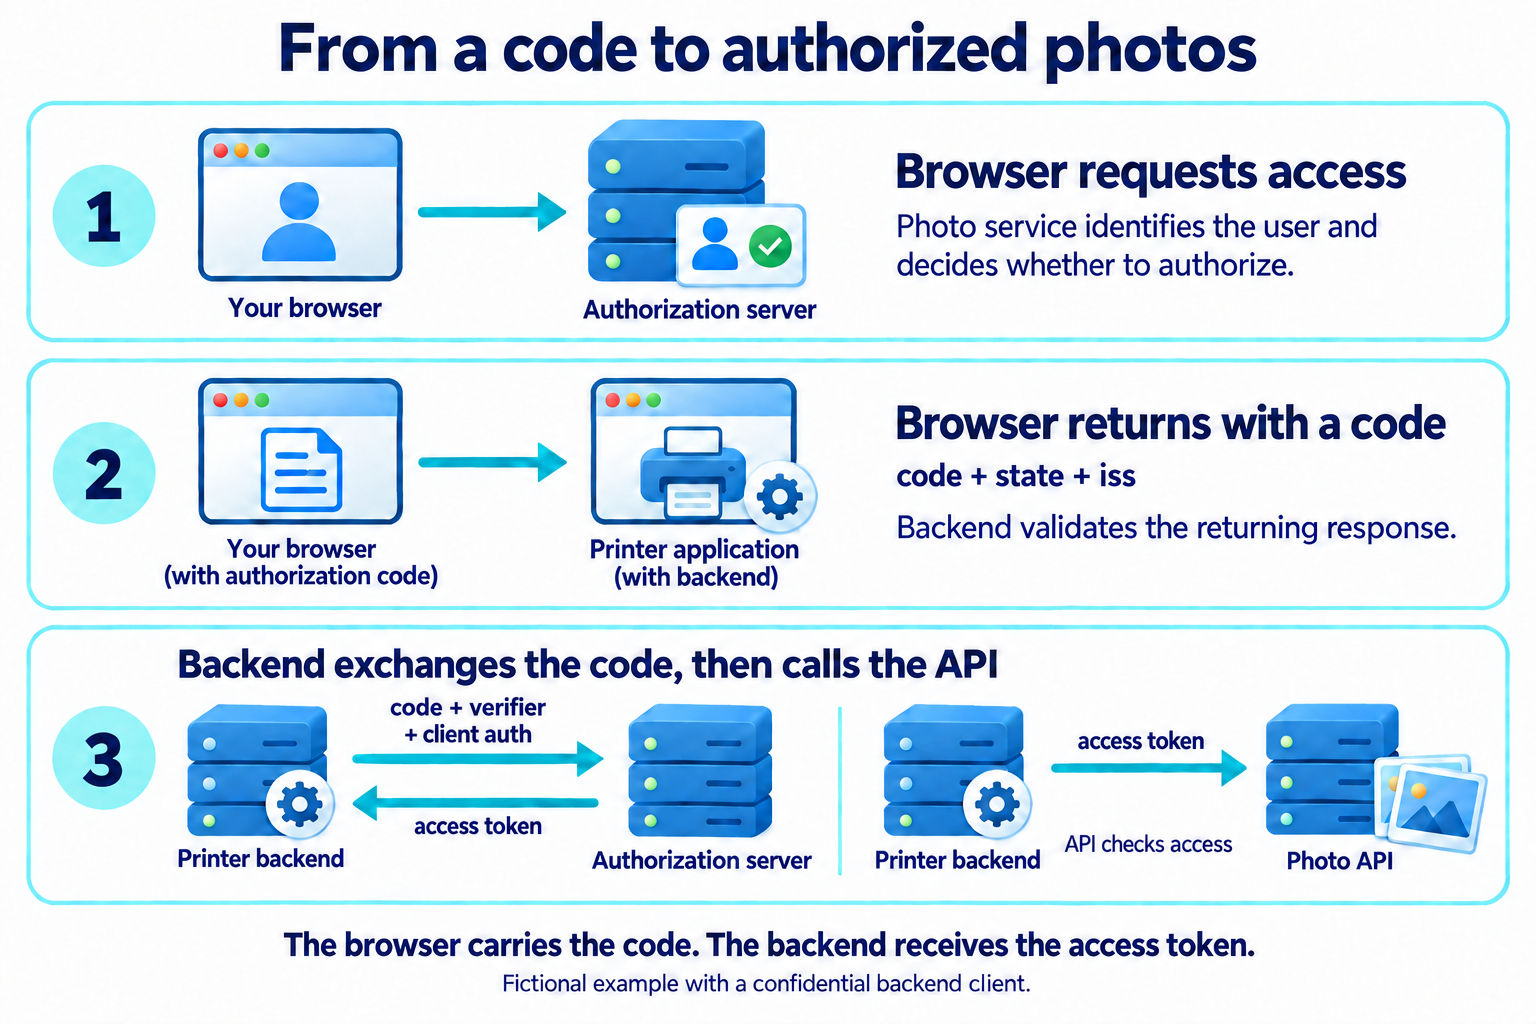
The browser carries the code in this example. The access token travels in the direct exchange between the backend and token endpoint, and the backend keeps it out of browser-facing responses.
The printer can now retrieve authorized photos. It has not received your photo account's password, and this OAuth exchange alone has not established a standardized sign-in result for a printer account. OpenID Connect addresses that separate requirement.
Each step in this outline has checks of its own. The following lessons take the steps in order, starting with The authorization request, the request the printer builds when you select Connect.